
Waterfalls are amongst the most interesting and challenging subjects to photograph. Waterfall photography is an art in itself and it also involves a lot of technical challenges as well.
In this post you will get all the tips and tricks of the trade to take some stunning waterfall pictures. We will see all about the gear you need , the settings you need to implement and some practical tips which will help you to learn waterfall photography very quickly.
Physical Waterfalls wallpapers and even desktop waterfall wallpapers are all time popular entities. Everyone loves them !
How to photograph waterfall
There are two main ways to shoot a waterfall.
- Slow shutter speed or long exposure waterfall photography : This is the most popular method. In this method we are trying to get the water to appear silky smooth and blurry while the remaining scene remains as sharp as possible. This needs a slow shutter speed to make the water movement blurry but not too slow to make remaining scene blurry as well. Sometimes multiple shots can be taken and combines in post as well.
- Creative waterfall photography : This falls under typical landscape photography and involves taking waterfall pictures from creative angles and including people and objects in the image to make it more interesting.
In this post we will take the long exposure waterfall photography as well as creative methods.


Waterfall photography equipment
Well a bear bones setup will include only a camera with kit lens and a tripod. That’s all !. However you can make it more interesting if you have some other camera gear as well. Lets take a look at all the equipment needed.
- The camera : Any camera which has control over the shutter speed is good enough. This is an advantage as beginners can also take stunning waterfall pictures with their canon rebels or even entry level mirrorless cameras. You need a camera that can shoot in manual mode or at-least in Tv mode. ISO control if available is an added advantage.
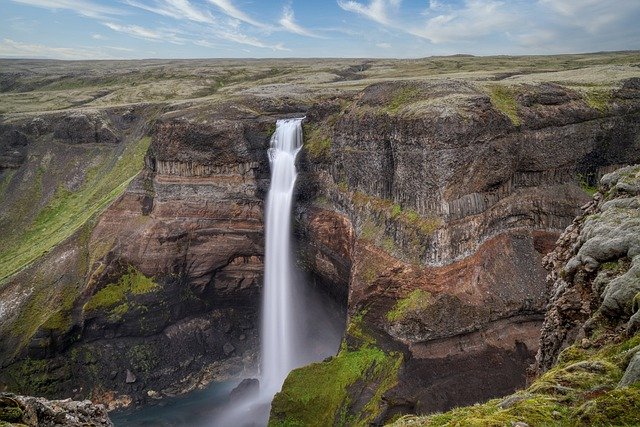
- The lens : You can use a wide angle or telephoto lens for shooting waterfall. A 16-35 mm lens is best for taking waterfall pictures. A wide angle lens will get some of the surroundings also in the frame and can give an opportunity for an landscape type shot with silky smooth water flowing in between. A 70-200 mm lens can also be used to get some unique and zoomed in views of the scene. A telephoto lens will compress the view and give you a more close view of the waterfall. This is also useful if you are far away from the waterfall. Below are some examples of wide angle and telephoto waterfall pictures.
- Tripod : If there is one thing that is most important in waterfall photography then its a sturdy tripod. Since you are using slow shutter speeds , you cannot shoot with camera in your hands and need to place it on a tripod. Buying a sturdy tripod will make life very simple and you can get some good waterfall pictures. While you could rest your camera on a stone or some other object, you will be limited by how much you can move the camera and what part of the waterfall you can capture.
- Neutral density picture : This is optional but many times required if you are shooting in bright day light. Once you take your ISO to a minimum value and set the aperture to the required level for a waterfall photography , you may end up with very fast shutter speed to get the exposure right. If you want the silky smooth waterfall then you need to slow down the shutter speed. In such a a situation a ND ( neutral density) filter is the only option. A 2 or 4 stop ND filter should do the trick. “ND” or “Neutral Density” filters are specifically designed for reducing the amount of light reaching the sensor in order to slowdown the camera shutter speed. There are many different types of Neutral Density filters out there and most of them differ by the amount of light they let through. You can also use a circular polarizer to reduce water reflections.


Best Settings for taking stunning waterfall pictures
This is the most tricky part of waterfall photography. Setting the camera up with right shutter speed , ISO and aperture combination is the key to success. Lets take a look at best waterfall photography settings we recommend.
Use a slow Shutter speed
A slow shutter speed is what we need. Slow can mean different thing for different scenes. In case of waterfall photography the range of shutter speed can from 1/4th of a second to several seconds.
You will need to experiment this with other settings to find the sweet spot. 1/4 or 1/2 sec can be a good starting point. If you go slower then you get beautiful silky smooth water but at the same time you will also start to capture the movement in trees , leaves and other surroundings. You need them to be as sharp as possible and only the water to by blurry.
We recommend to start with something below a second and then try to slow it down till you a reach a nice balance.

Select the right Aperture
Use the aperture where your lens is sharpest. Generally you should use F8 to F11. Most lenses are very sharp at F8 and this small size aperture will also have a large depth of field.
This will help to capture scene with equal sharpness. You do not really need fast prime lenses for shooting waterfalls and even standard kit zoom lenses can do a good job.
If you use a ND filter then you can also take some interesting pictures with shallower depth of field as you can shoot at much wider aperture even while you maintain slow shutter speed.
Use low ISO setting
Using the lowest ISO setting such as ISO 100 will not only give you the best image quality but it will also help you to slow down the shutter speed. For example, decreasing camera ISO from ISO 800 to 100 on a DSLR decreases the shutter speed by three full stops, so if you were shooting at 1/200th of a second, you would end up with a shutter speed to 1/25th of a second.
We recommend to shoot at lowest possible ISO your camera allows. Low ISO images are inherently less noisy and can be easily edited in post processing.
Use RAW Image format
Always shoot waterfalls in RAW whenever possible. This will give you a lot of opportunities to edit and correct in postprocessing. You can also get a lot of color , contrast and sharpness out of your image that way.
Multiple exposure shots can also be easily combined to create a stunning waterfall picture.
Practical tips for great waterfall images
Waterfall photography is not all about settings and equipment. You will face many practical challenges during the shoot and here are some tips and tricks to save you some time and hassle.
- Start with our waterfall photography cheat sheet. This will be a good staring point and you will not be too far away from optimal settings.
- Find a place for your tripod slightly ways from water itself. If you have to place your tripod in the water best to keep the legs firmly engaged at the bottom of the waterbed. Any movement of the tripod itself will ruin your image and most likely you will notice the issue only during post processing as small defects are not visible in small LCD screen at the back of the camera.
- Ensure that your camera or lens image stabilization is off. Image stabilization if turned on with a camera on tripod and forcefully try to stabilize the image when it does not need one and can actually result in blurry overall image.
- Shoot with at least two lenses a wide angle and a telephoto. This will give you different perspectives of the same scene. A 16-35 and 70-200 are good options as they give completely different framing options and distinct image aesthetics.
- Shoot at the right time of the day. Avoid bright daylight or noon timings for waterfall photography. You should try and shoot around sunrise and sunset, the so-called “golden hours”, when the sun’s rays are less intense and diffuse. This time of day allows for a more even exposure and allows you to use a slower shutter speed. For the same reason, overcast days provide excellent lighting conditions.
- People tend to hold their cameras in portrait orientation because waterfalls are tall in nature. This often results in a shot that is identical to all others. Although it may not seem natural to hold your camera in landscape orientation, this will allow you to see more of the surrounding area and make more creative choices about how you frame the scene.
Creative waterfall photography
It’s easy for people to lose sight of the creative side when there are so many technical details to think about. Waterfalls can be photographed in the same way as any other subject. You need to spend time creating striking and engaging compositions.
Here are some things to remember …
Find a Unique Viewpoint
Most people will face a waterfall by standing on the bank of the river and pointing their camera straight at it. This will often result in the same boring photo we have seen thousands of times.
To find an interesting composition, spend some time exploring the surrounding area. Photograph from higher up, through trees, bushes, behind the waterfall or just above the stream to get a unique and creative perspective.
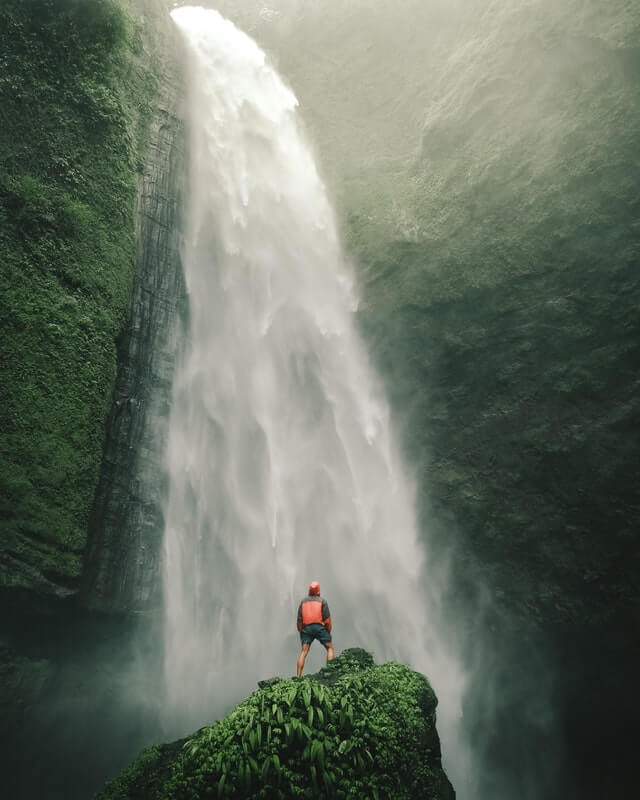
Include people in your shot
This can really add life to your photographs. You can also try and shoot a portrait with the waterfall behind the subject. All you need is to take multiple shots with different shutter speed values but with same exposure.
You can merge these later in photoshop using layers and masks to turn it into a stunning image with tack sharp subject in foreground and silky smooth waterfall in background.
Telephoto shots with someone looking towards waterfall also makes for an engaging image.
Waterfall photography Cheat-sheet
| ISO | Start with lowest possible , ISO 100 is recommended |
| Shutter speed | 1/4th of a second or 1/2 second is a good starting point. Try taking multiple shots with shutter speed upto several seconds. |
| Aperture | F8 to F11 is ideal range. Use wider apertures for creative effects. |
| ND filter | Select based on your exposure requirement. A 3 stop ND filter should generally work well. |
| Tripod | Use a sturdy fluid head tripod. |
| Image format | Shoot in RAW if possible or else highest quality JPEG |
| Image profile | Use neutral picture profile |
Final words
As with all other aspects of photography, waterfall photography involves both technical and artistic sides. You need to first master the technique so that you are not bogged down with it and you can then let your creativity flow.
Photography can be learned by taking more and more pictures and waterfall photography is no exception. So just go out and take some great waterfall pictures !


